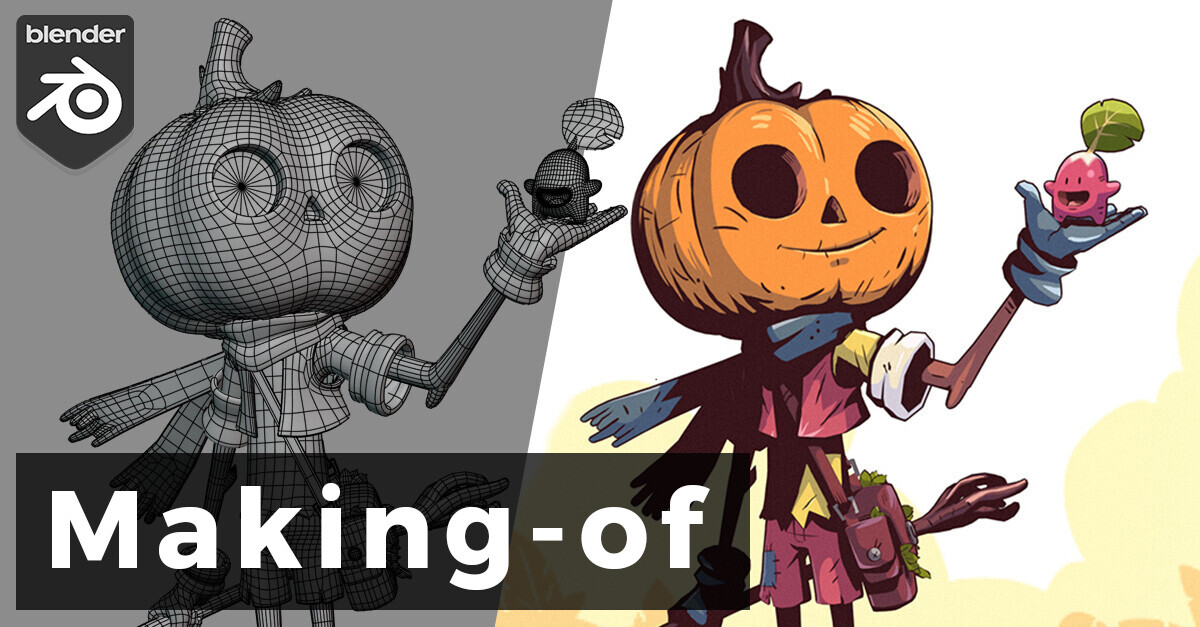
Inspiration
I am always looking for new sources of inspiration and challenges to learn and improve my skills. When I was scrolling through my Instagram feed last month, I stumbled upon the brilliant concept art of Derek Laufman. Inspired by the style and confident lines of the 2D sketch, I wondered how I could translate the sketch into 3D.
Modeling
After carefully studying the artwork by Derek Laufman, I started roughly blocking the characters in T-pose. Because I knew I wasn't going to animate the character, a well deformable topology was of secondary importance but is always a good exercise. I blocked the different body parts with primitive shapes and refined them with basic poly modeling tools.
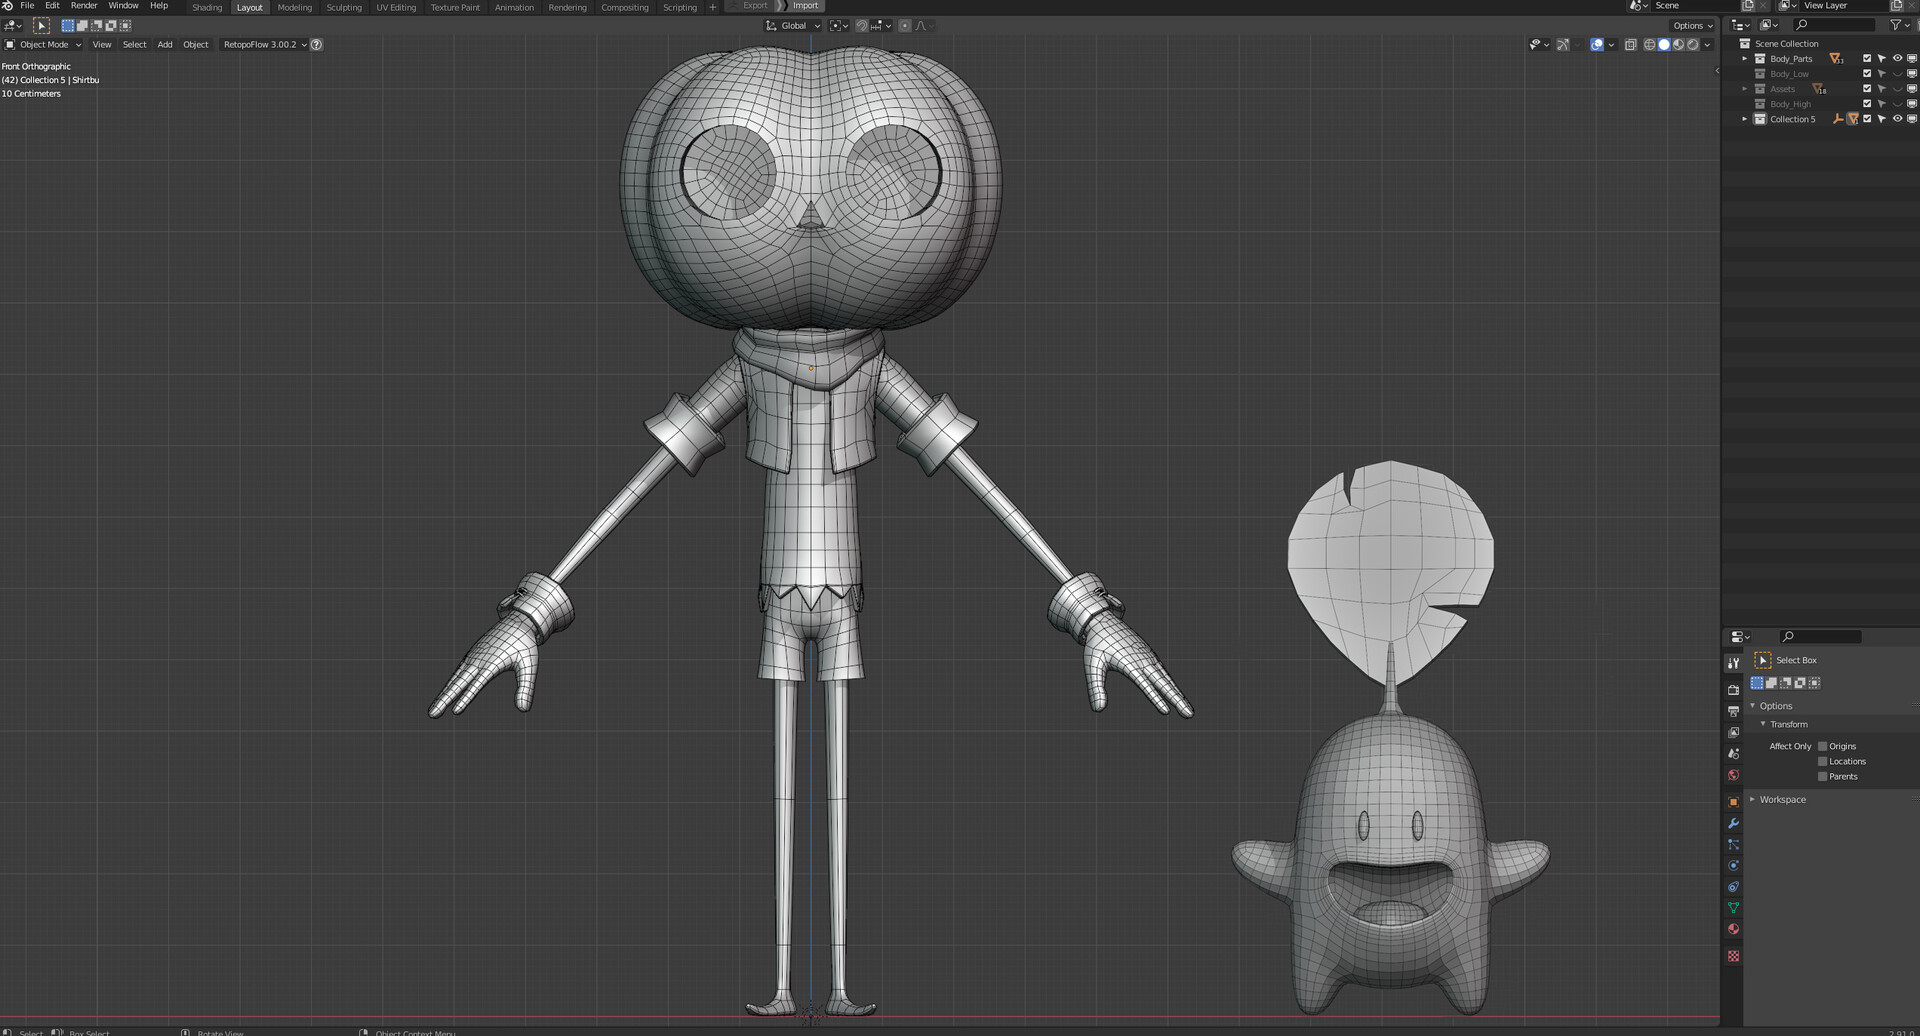
With the same technique, I modeled assets like the bag, the scarf, the rocks, and the staff. True to the motto “work smart, not hard” I tried to save as much time as possible during the repetitive steps of this piece. For the numerous leaves, for example, I modeled a low poly “sample leaf”. Then I made a quick UV unwrap and moved the duplicated leaves to match the reference. Once all the leaves were in place I used the sculpt tools and simple translation and rotation to get their silhouettes right. This way I had to define the UV seams only once for all the leaves. It seems like a small thing, but planning ahead like this saved me an enormous amount of time and allowed me to work more on challenging steps like sculpting the characters into pose.
Sculpting into pose
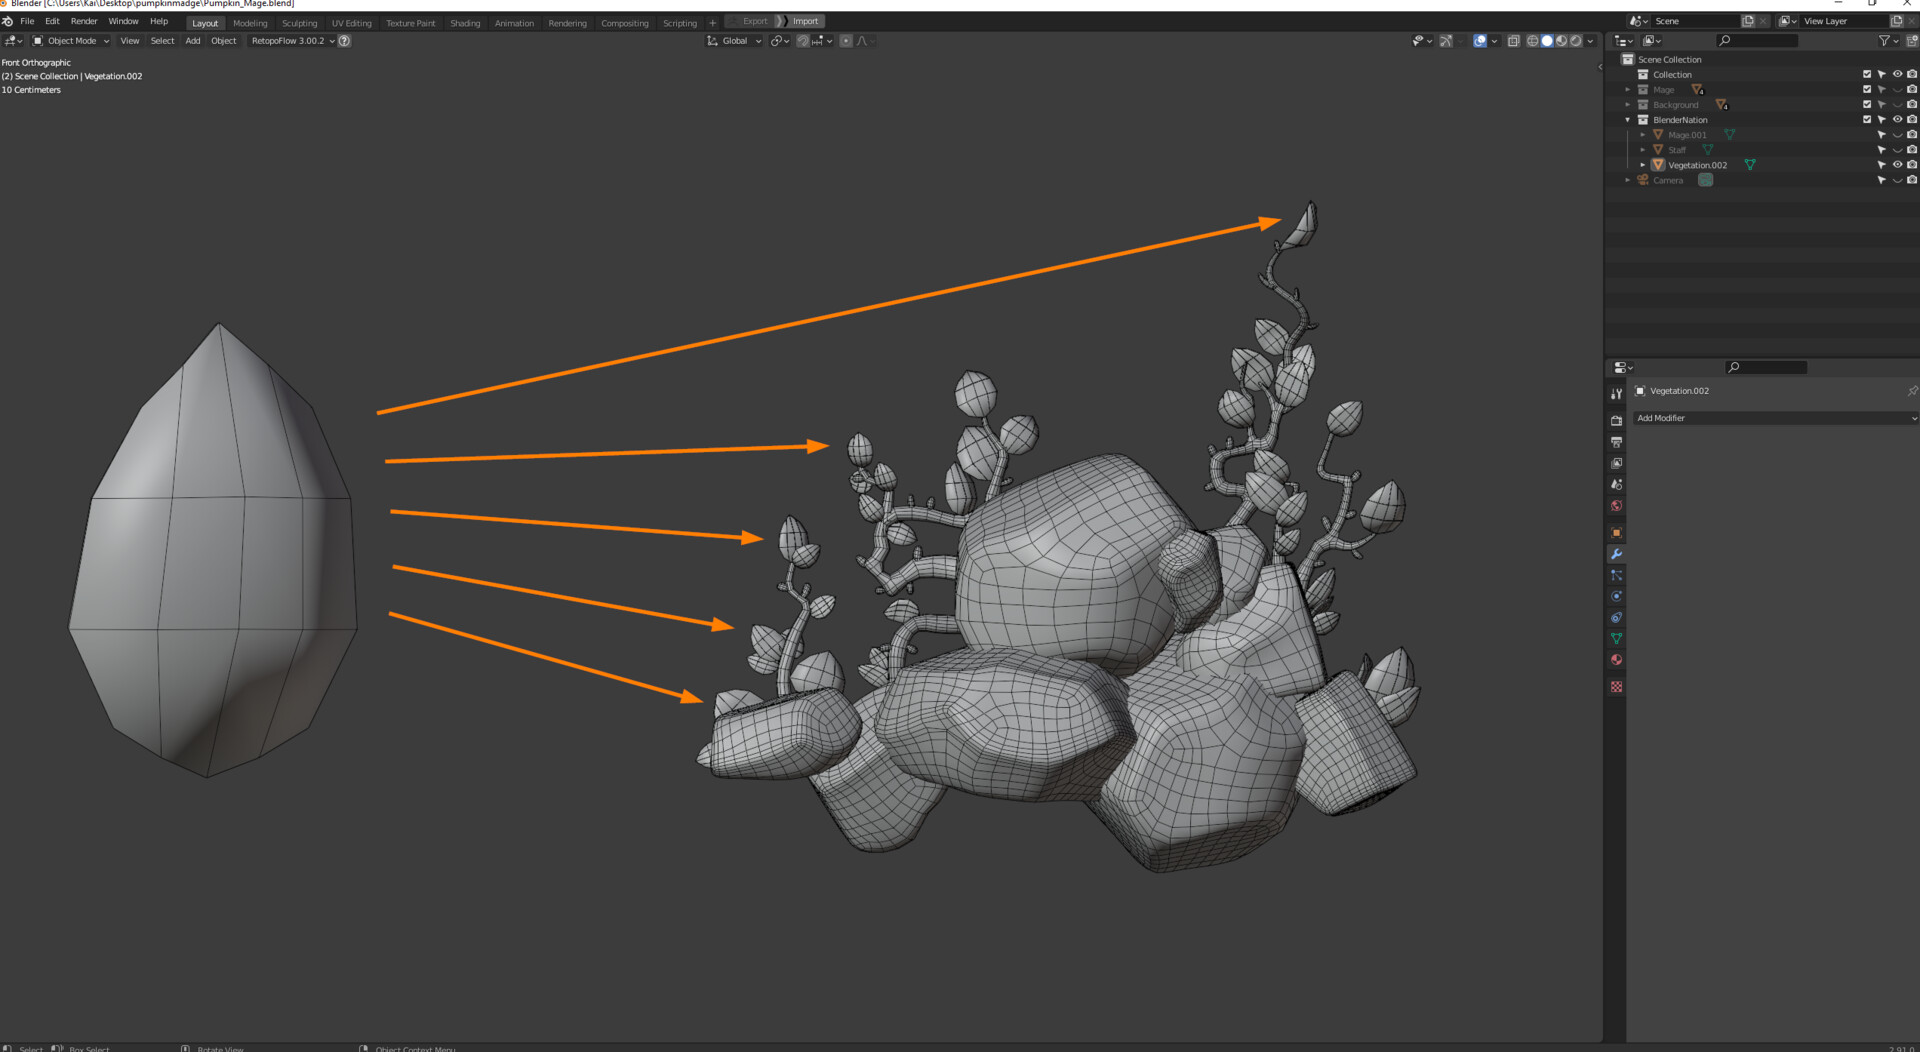
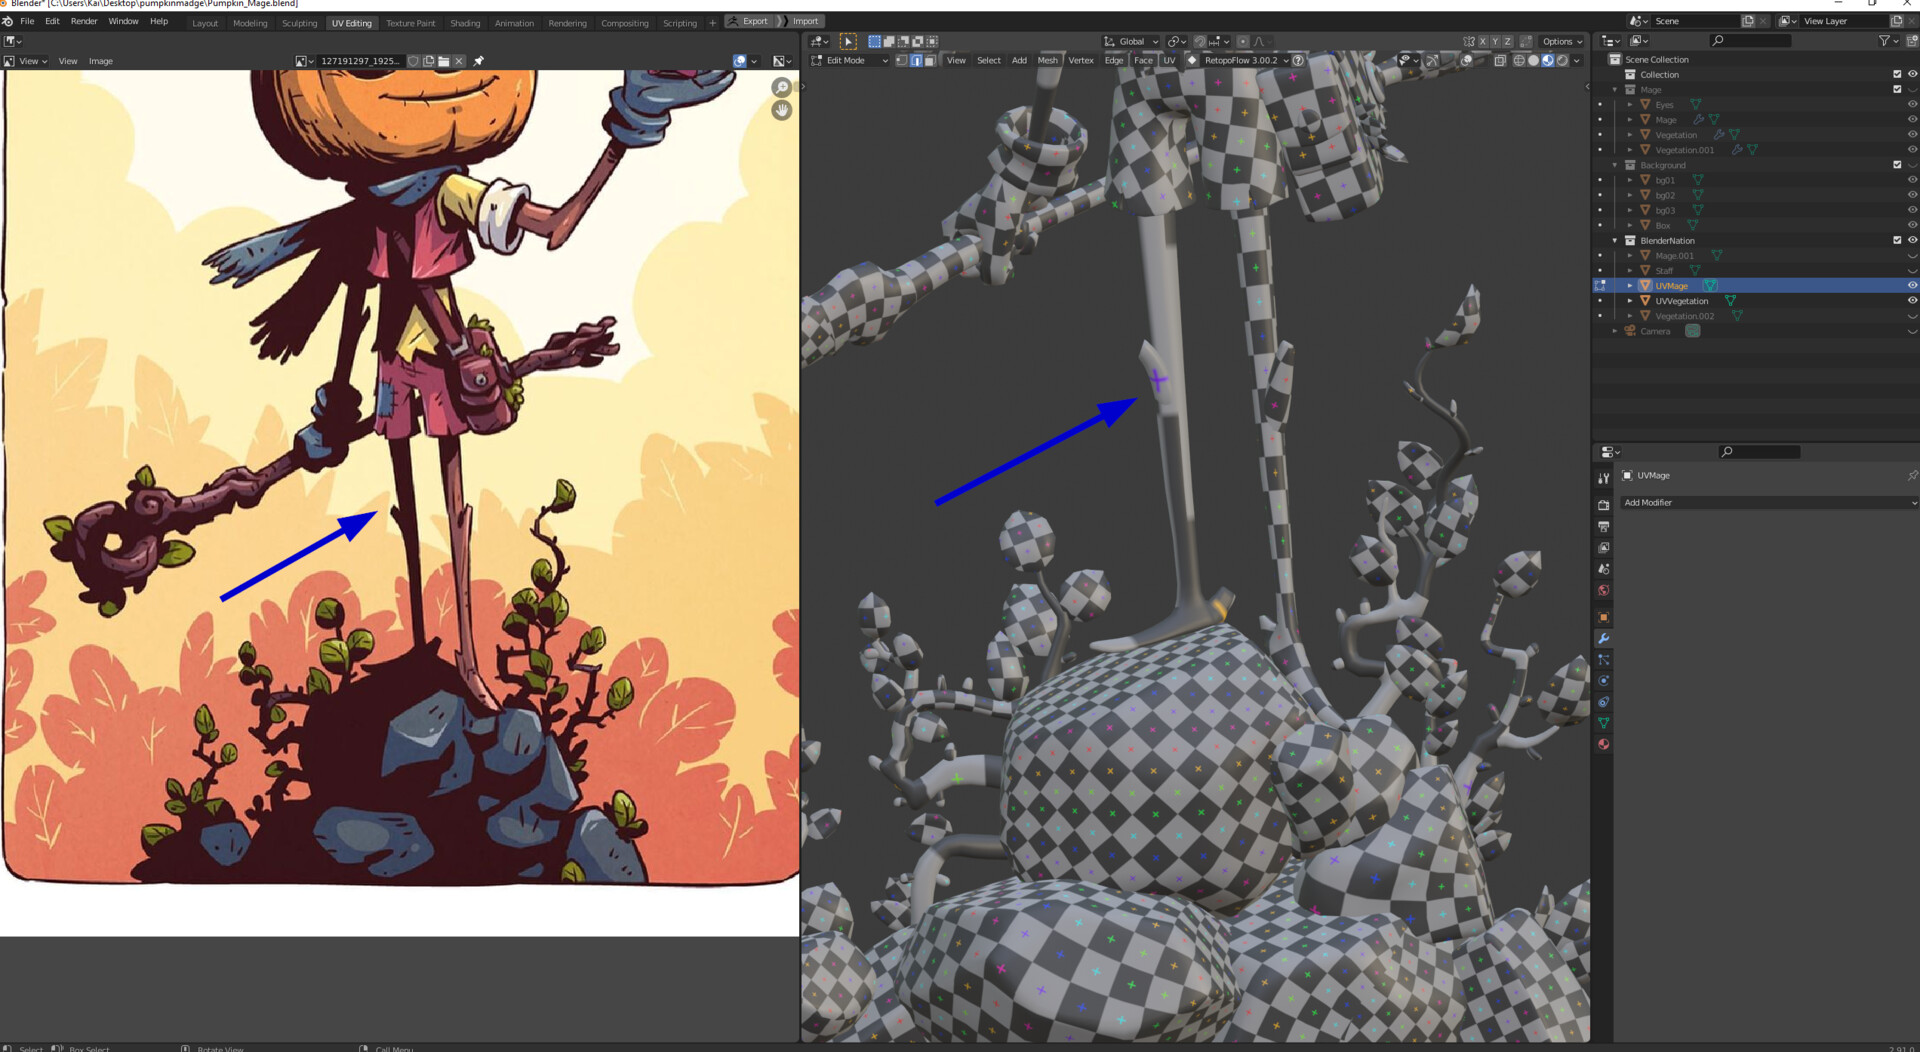
With all the parts of the piece modeled, it was time to pose the characters and match the reference as closely as possible. For this, I imported the reference image as a plane into Blender. With the image on top of my sculpt, it was fairly easy to match the reference. In sculpt mode I used simple masking and brushes like “grab” or the awesome “pose brush” to pose the character. As I said, I spent a lot of time on this step because a strong pose with a clean silhouette is extremely important for the appeal of the final piece.
Once I was happy with the pose and the silhouette, I decided to render the character with a clay material. This allowed me to test the 3D shapes in a lighted environment and spot any errors early on. After going back to posing, a bit of tweaking, and another clay render, I was happy with the result and was ready to start with the UVs.
UV Editing
To get the UVs done quickly, I mapped two shortcuts: one for setting seams and one for removing them. Blender is super customizable. You can assign a shortcut to almost anything by just right-clicking on something in the UI and then pressing the "assign shortcut" button. With this simple tweak, I was able to unwrap the model pretty quickly without getting lost in many menus. For the UVs, I usually use two add-ons alongside Blender. They save me a ton of time. The first one is called TexTools. The add-on offers an extensive set of tools for working with UVs and Textures. The other one is called UVPackmaster 2. UVPackmaster 2 automates the process of UV packing and is worth every penny. In a production environment where I would pass the model to a fellow human to texture the character, I would still pack the character by myself. But in a quick and dirty weekend project, having an automated way to pack UVs rapidly and efficiently is a huge time saver.
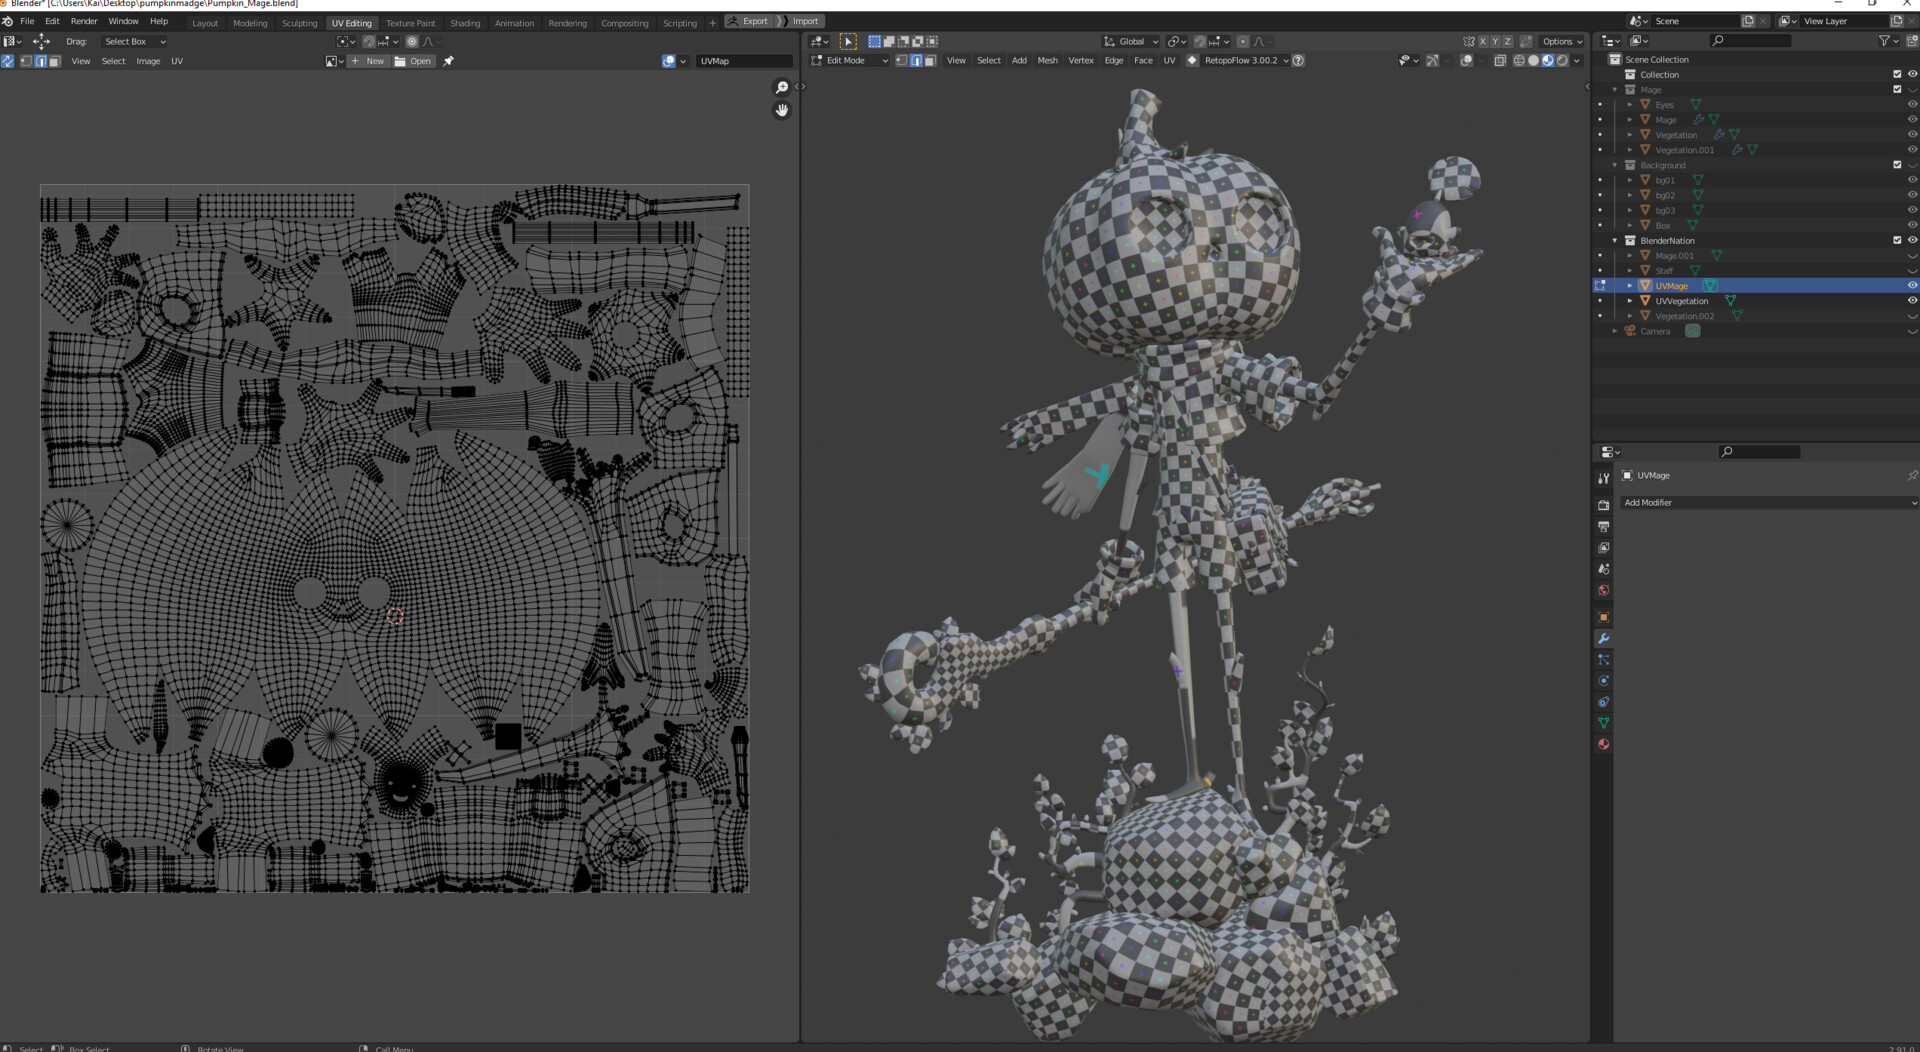
Special for this project was that I set the scale of the islands by hand according to the amount of detail needed in the final piece. The right leg of the mage has much less resolution than, for example, the shirt or the head. I did this deliberately because I knew that in the final piece, the right leg would be totally covered in shadows and therefore would only consist of one color.
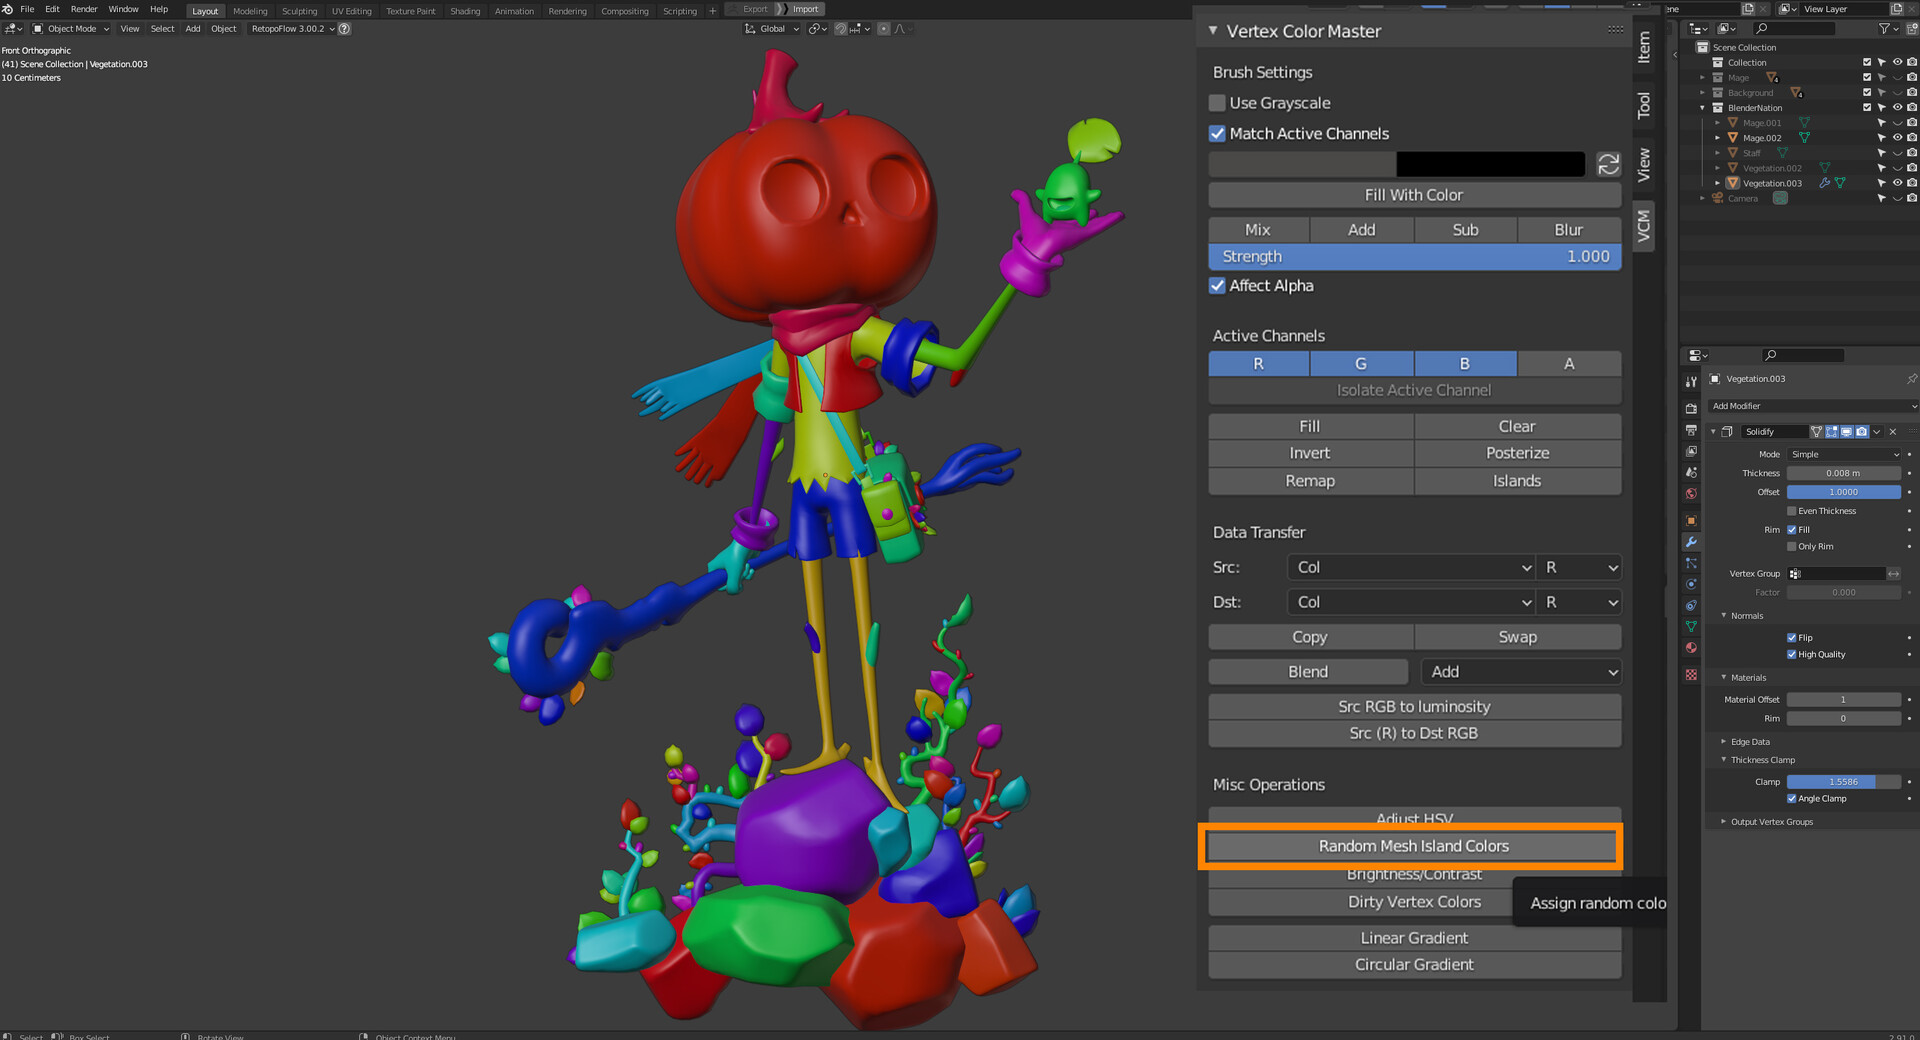
Before jumping into Substance Painter, though, I cleaned up my file and exported the mesh as an FBX out of Blender. A handy trick I often use when working with Substance Painter is a color ID map. To generate the map, I use Blender to color the parts that share the same material with a random vertex color by pressing shift+K in the Vertex Paint Mode. A handy add-on to speed up this workflow is Vertex Color Master. With the press of a button you can assign random colors to mesh islands. As soon as the model is imported into Substance Painter, the ID map is automatically generated during the baking process—super handy.
Texturing
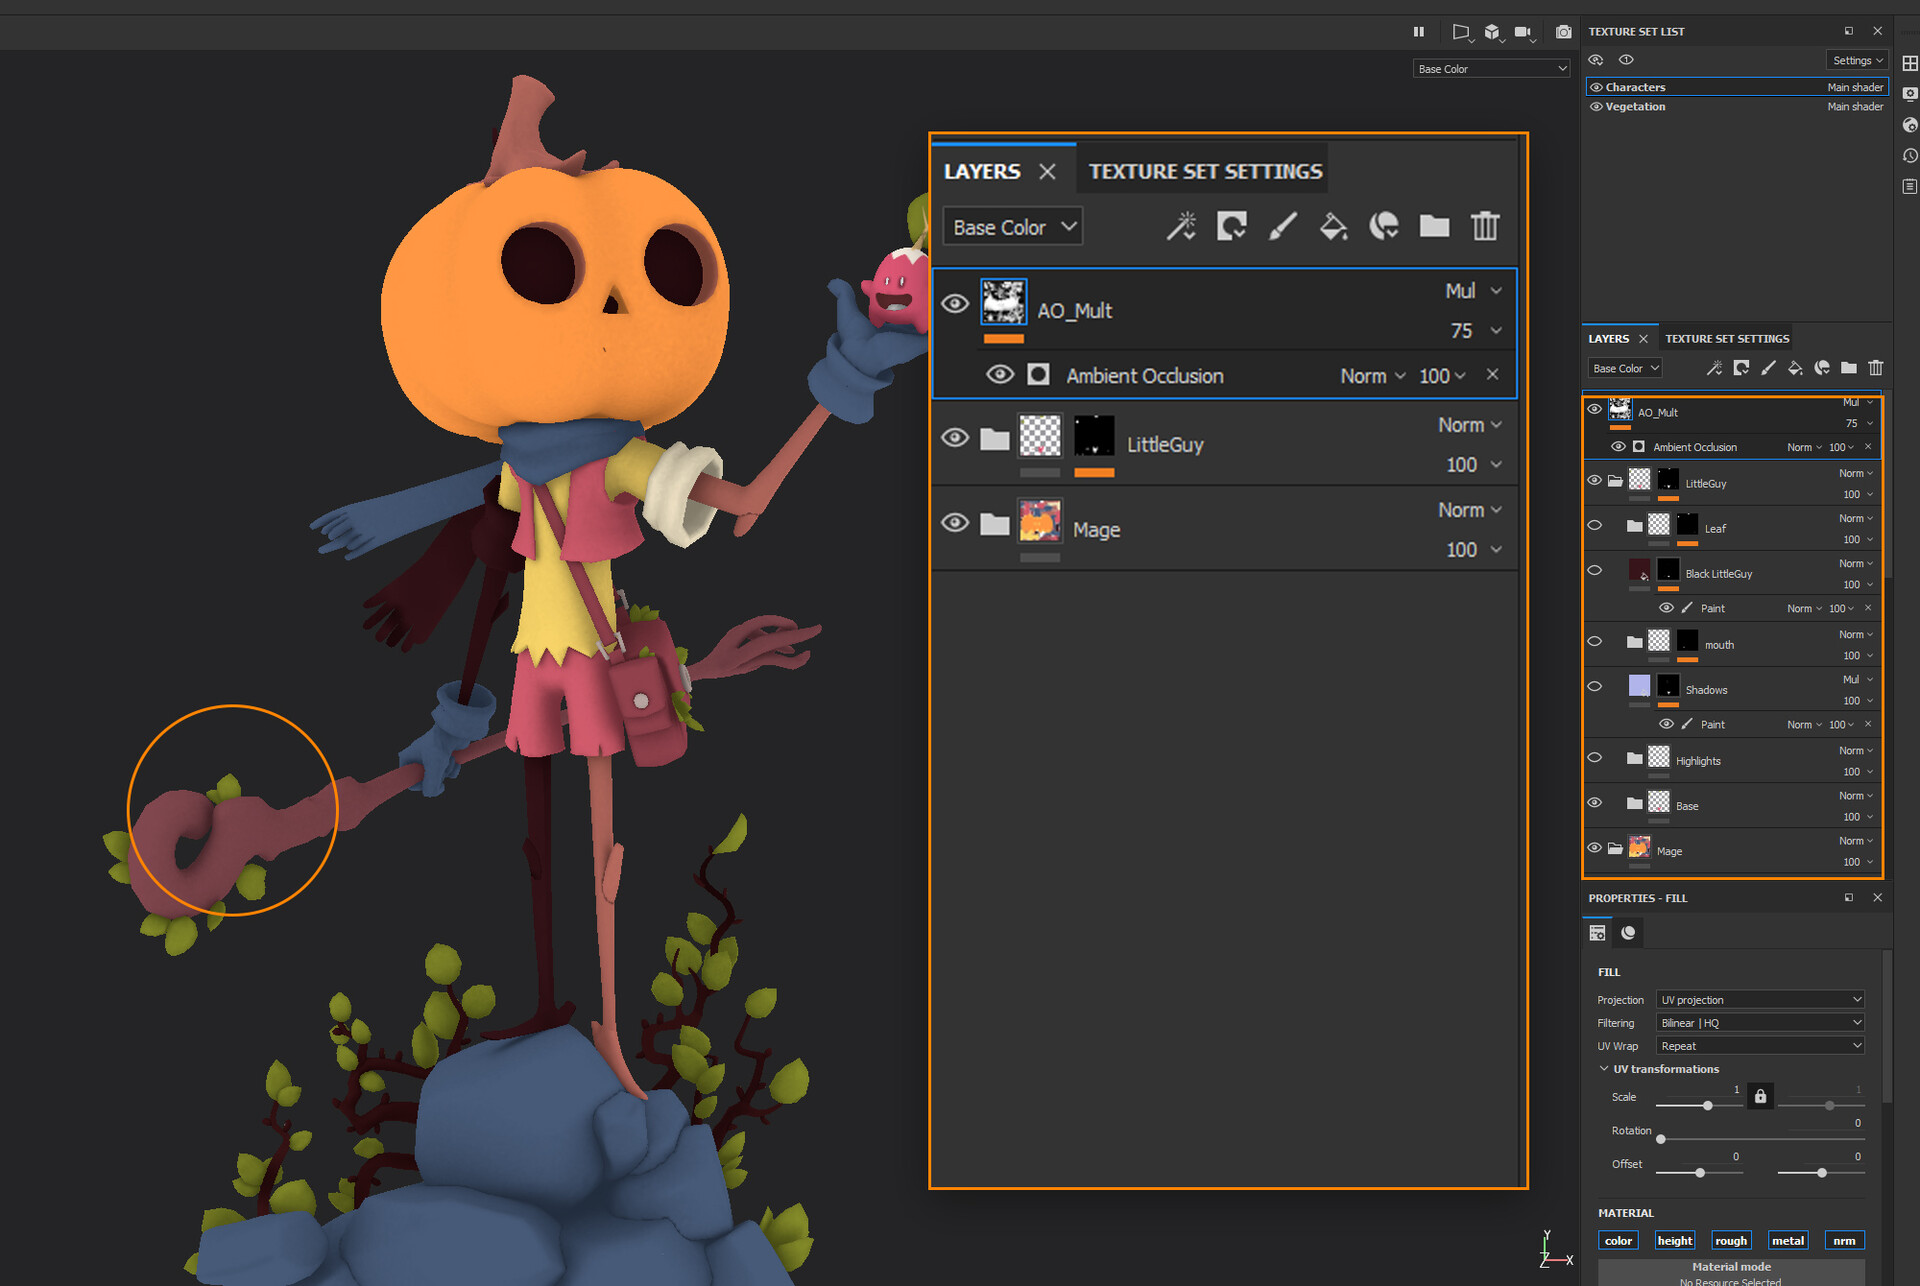
Right after importing the model I baked textures with Substance Painter. For this model I baked a Color ID Map from the Vertex Colors and an ambient occlusion map. I used the Color ID to generate masks for the different base colors of the model. The layer-based approach of Substance Painter is quite handy for a stylized character like this one. The different parts consist of a few layers and only vary in hue of color. Those are usually a base color, a darker color, a highlight color and the black color that makes up the shadows over the whole character. I utilized the folder and layer system to put each part of the model into a separate folder. This way I could work non-destructively and focus on each part individually.

Because I turned off the lighting in Substance to see the color without any shading, I overlaid the ambient occlusion map on top of the model and set it to multiply. With this I was able to see where the features of the character were.
Finally, it was a matter of texturing the character layer by layer until it was finished. The difficult part here was that I had to imagine the sides of the character not facing the camera, so the model would make sense as a whole.
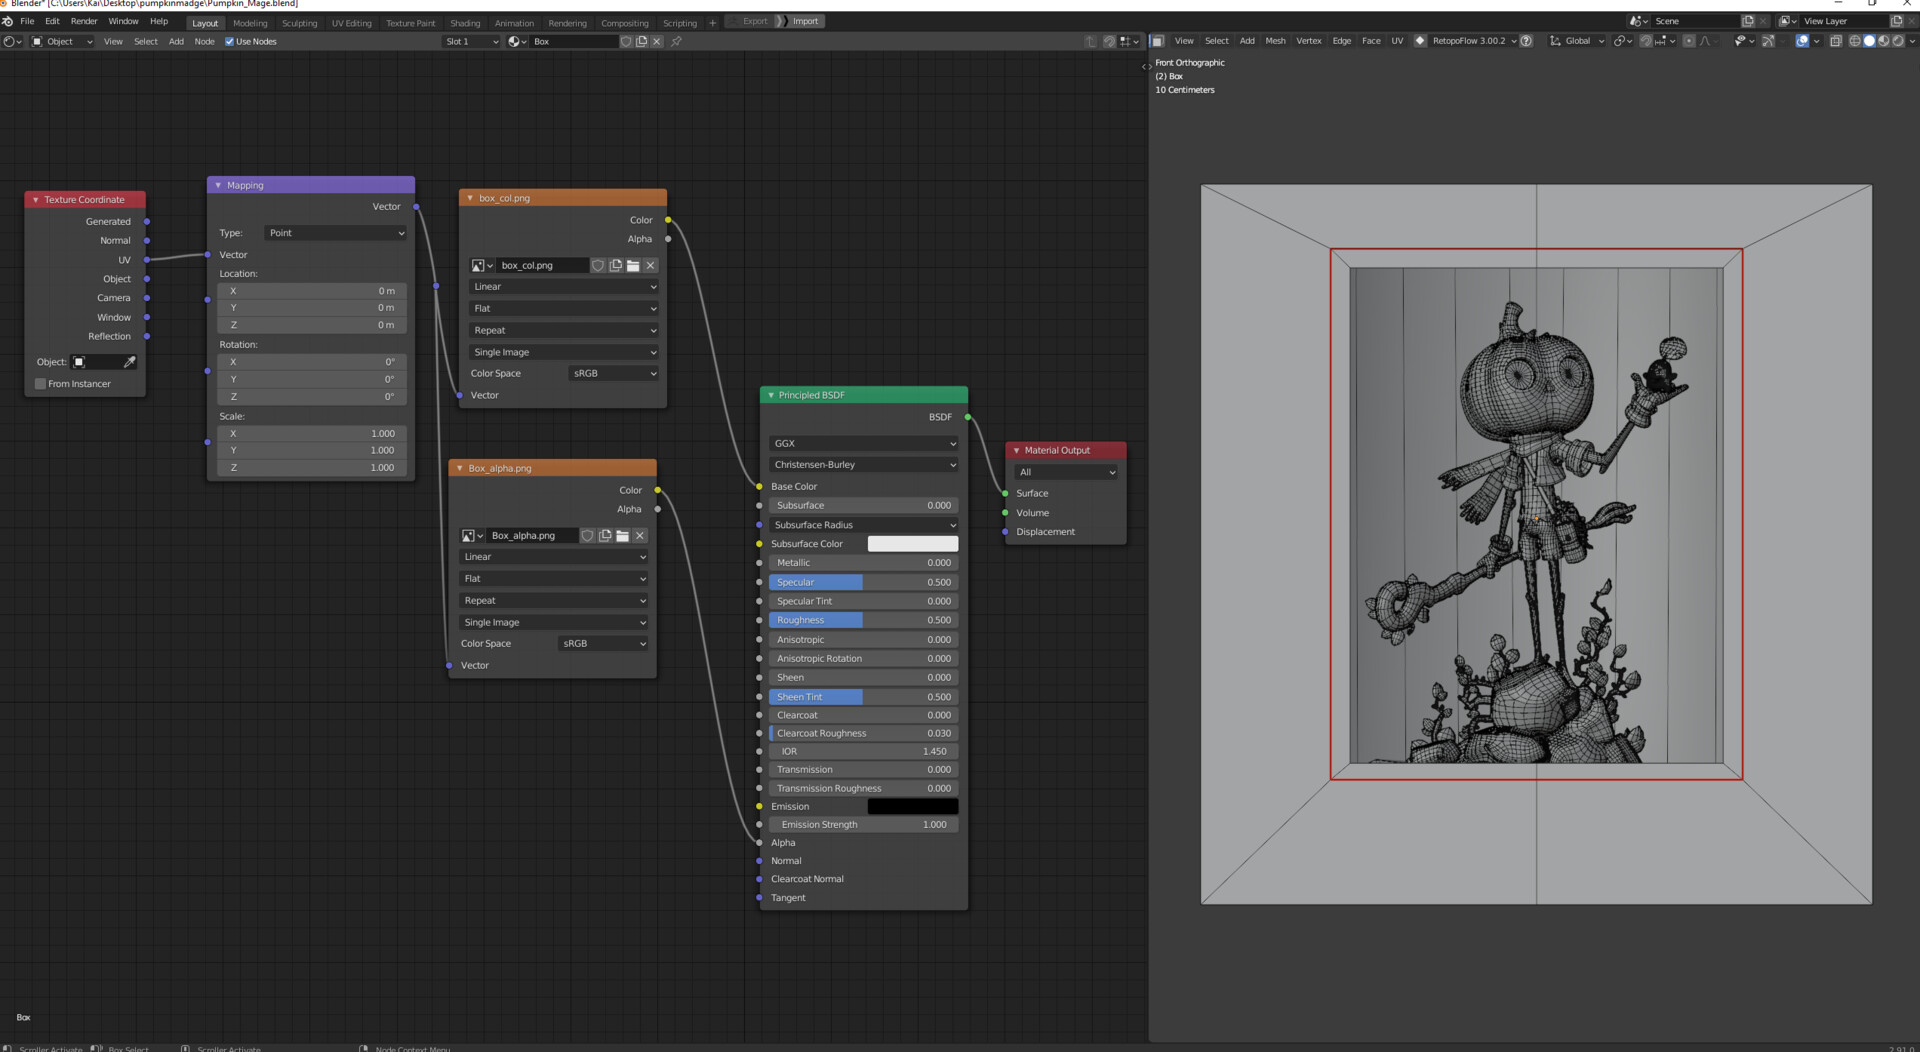
Cartoon look and outlines
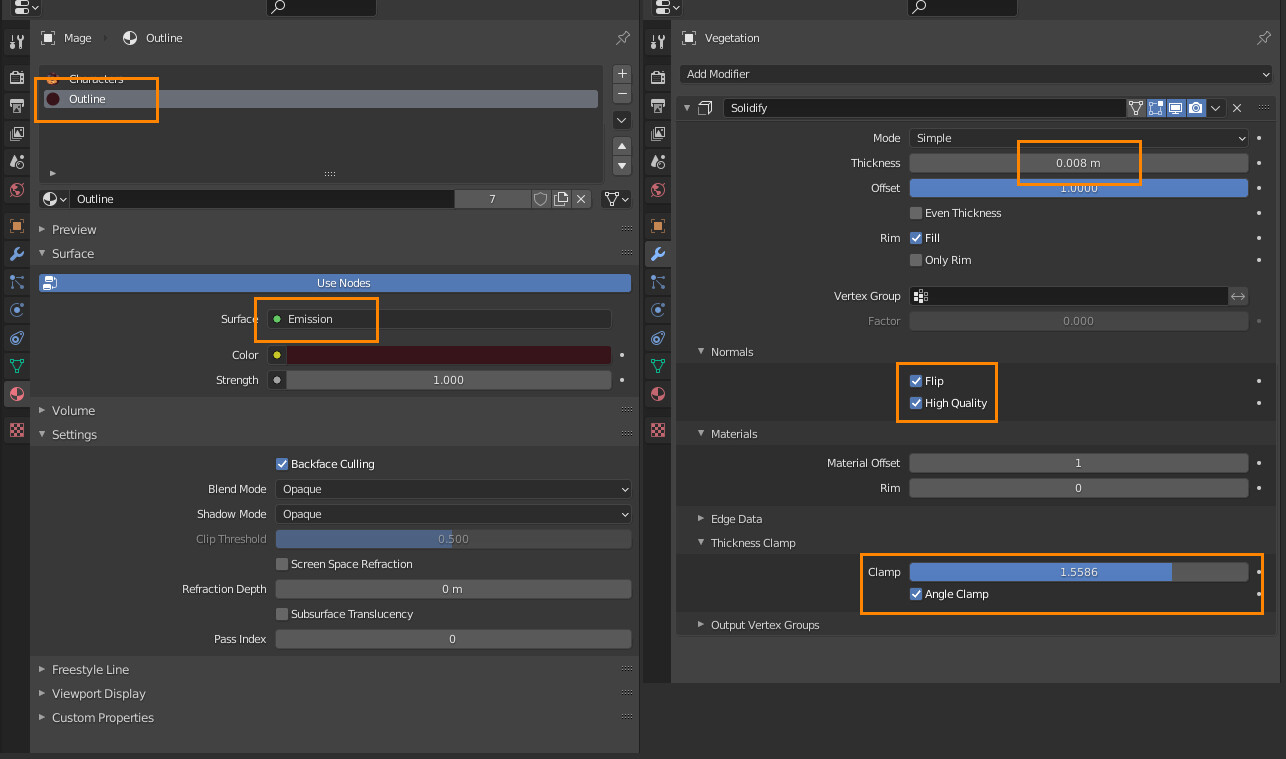
Back in Blender I imported the base color textures from Substance Painter. To get the flat 2D look, I deactivated all post-processing effects in EEVEE and plugged the base color textures into the emission socket of the principled BSDF material. This way the model was able to illuminate itself. I also added an outline to the whole piece. To create a convincing outline I used the “inverted hull method”.
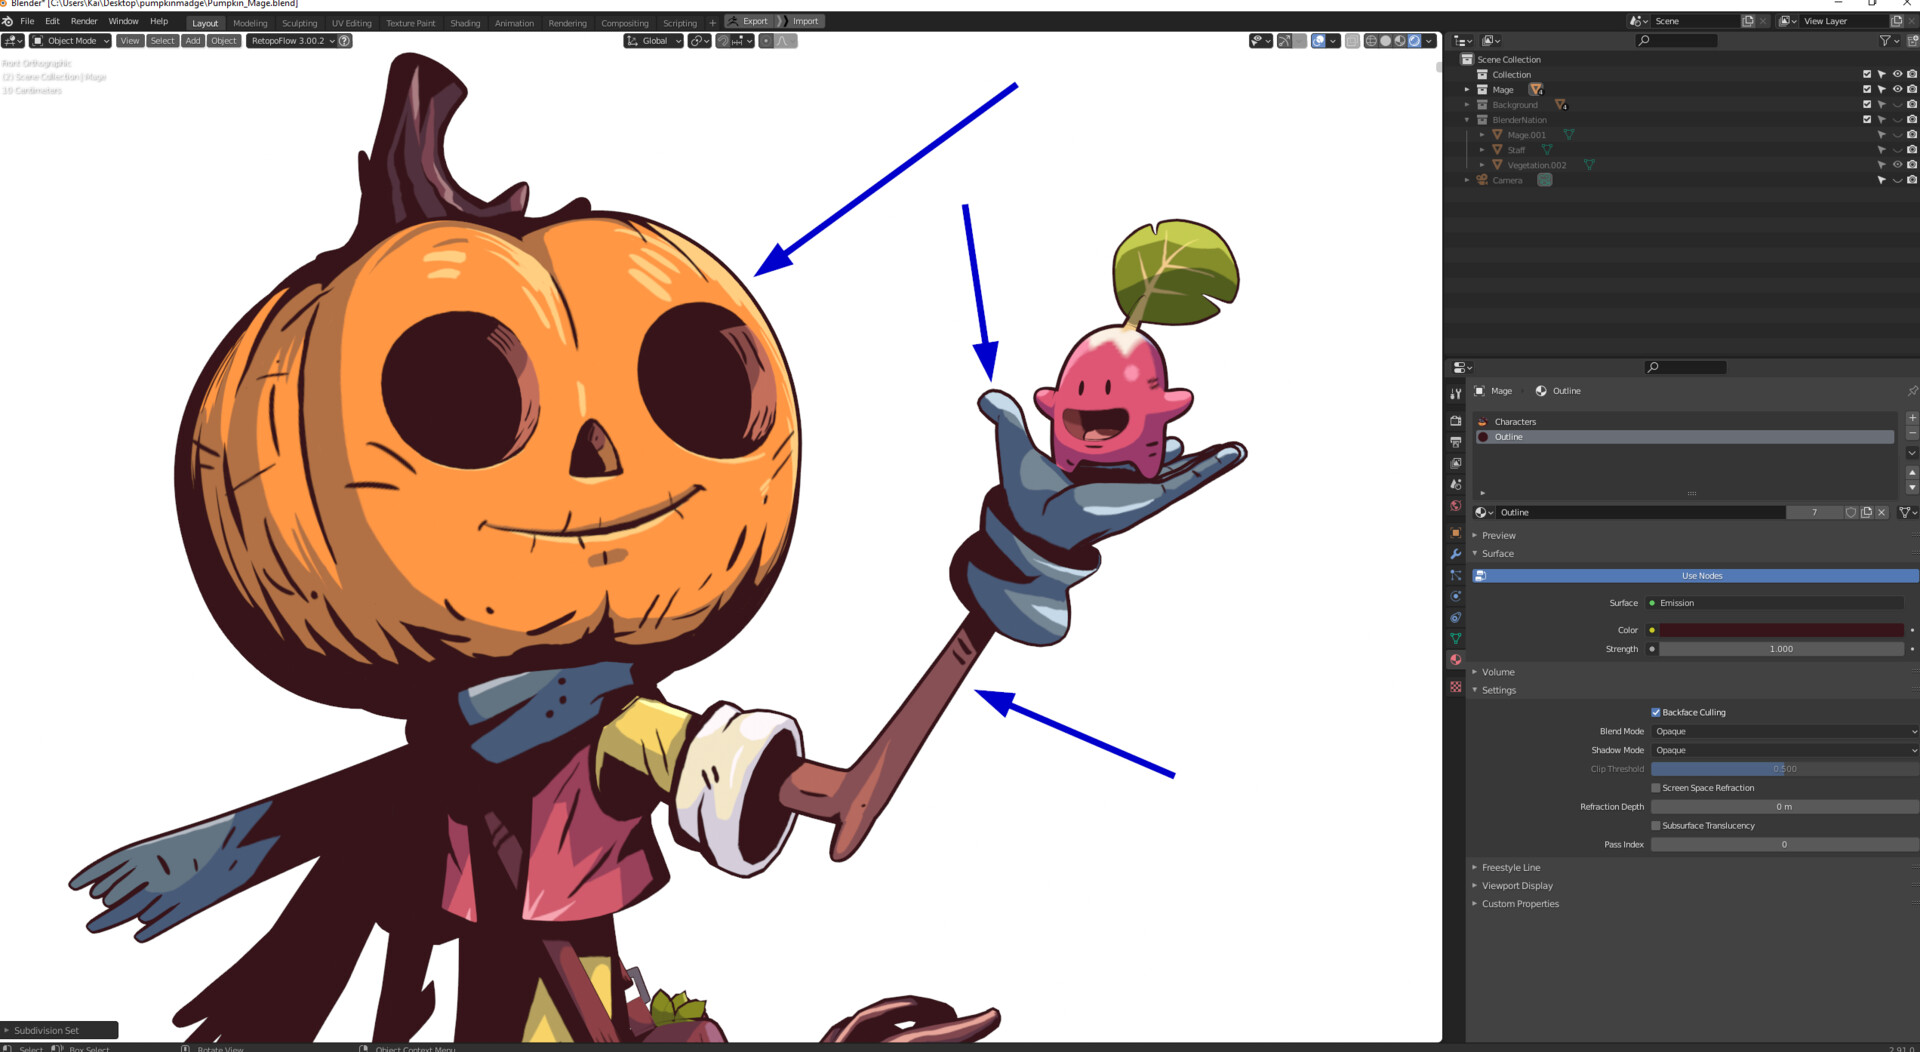
For this I created a second material slot and added an emission material for the outline. I sampled the exact color from the darkest parts of the textures that I created in Substance. Then I joined all meshes that were sharing the same material and added the solidify modifier. The “inverted hull method” with the solidify modifier is very flexible, and you can achieve vastly different results with it in order to fit your style or liking. The most important settings are the flipped normals checkbox, the thickness and the clamp slider. Everything else is optional. You could even use vertex groups to tweak the details manually, which is super neat.
Background and frame
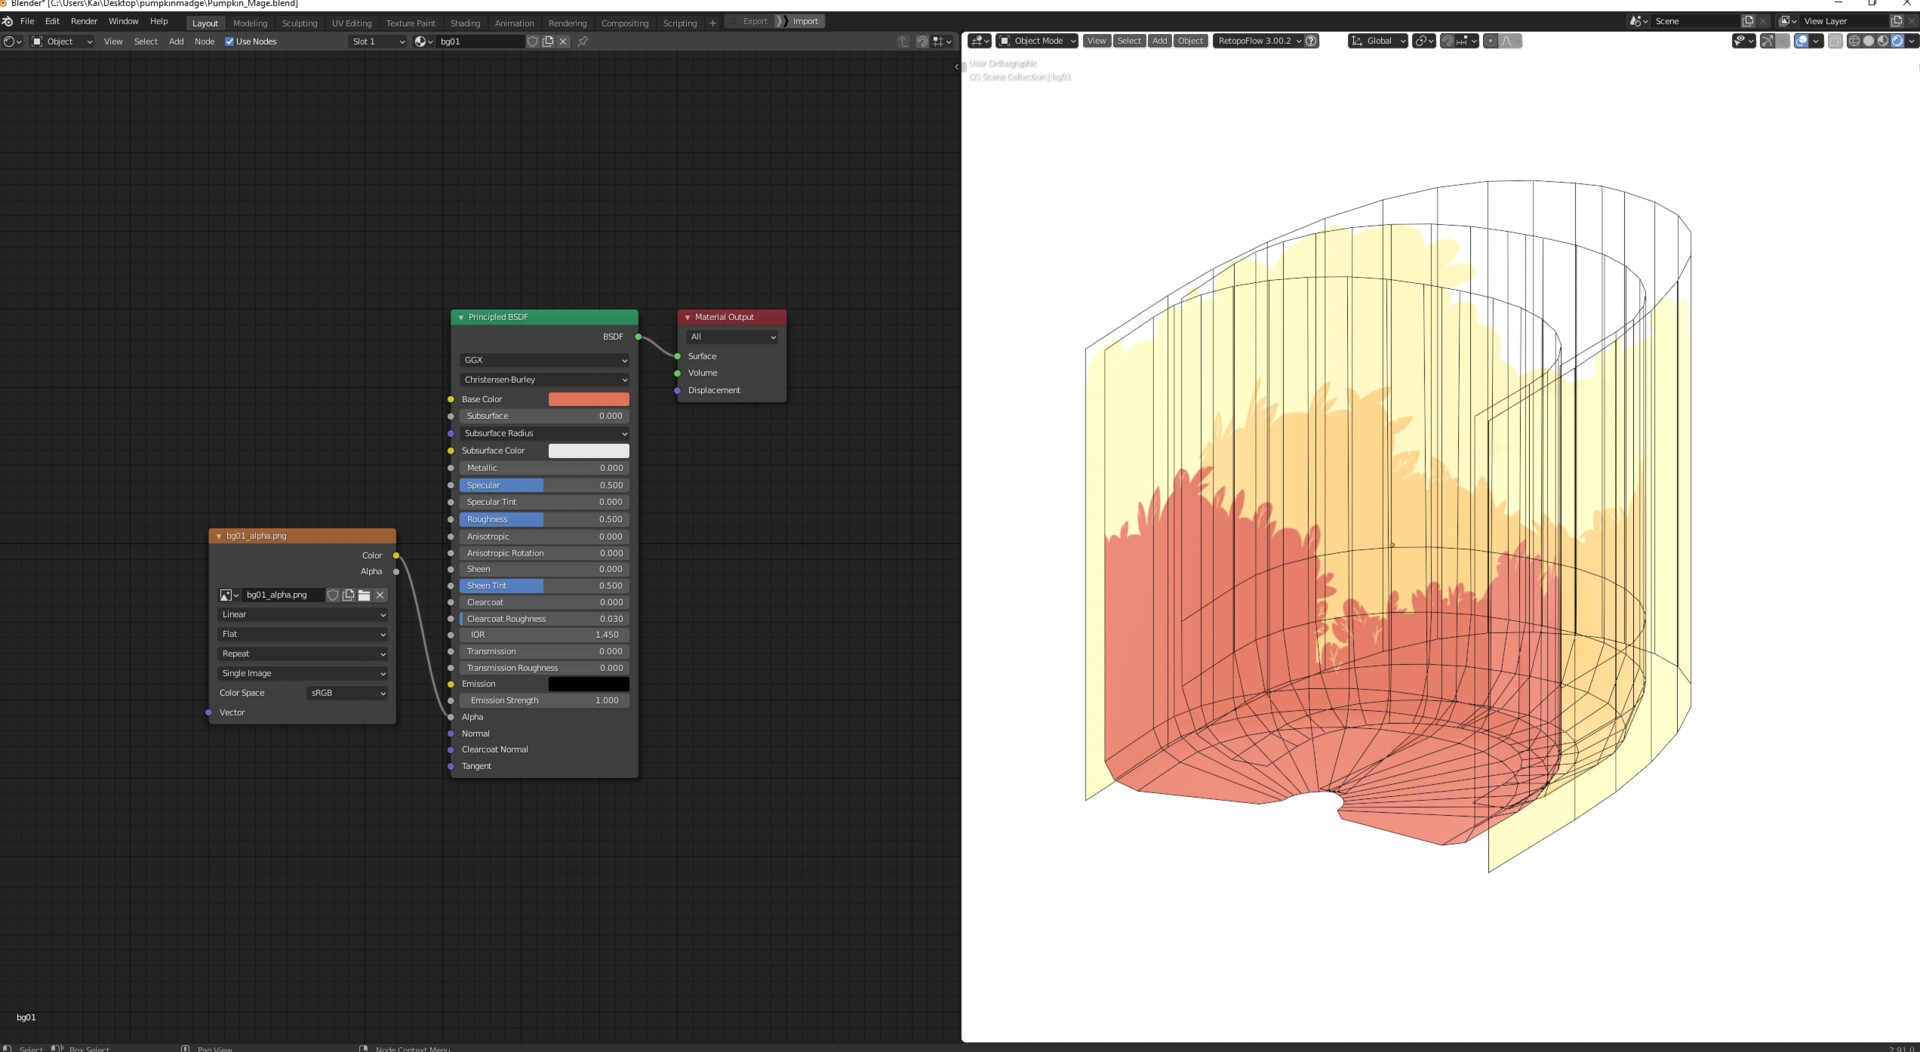
For the presentation in Sketchfab I wanted to create a parallax effect with a simple line as a frame. I painted alpha masks in Krita for the different background cards. Then I plugged them into the alpha socket of a material node with a simple color. In order to get the transparency of the alpha channels working in EEVEE, I had to set the blend mode from “opaque” to “alpha blend”.
For the frame, I modeled a simple box around the scene. I changed the projection of the viewport camera from perspective projection to orthographic projection in order to get a convincing 2D look. You can toggle the views in Blender with the hotkey “numpad5”.
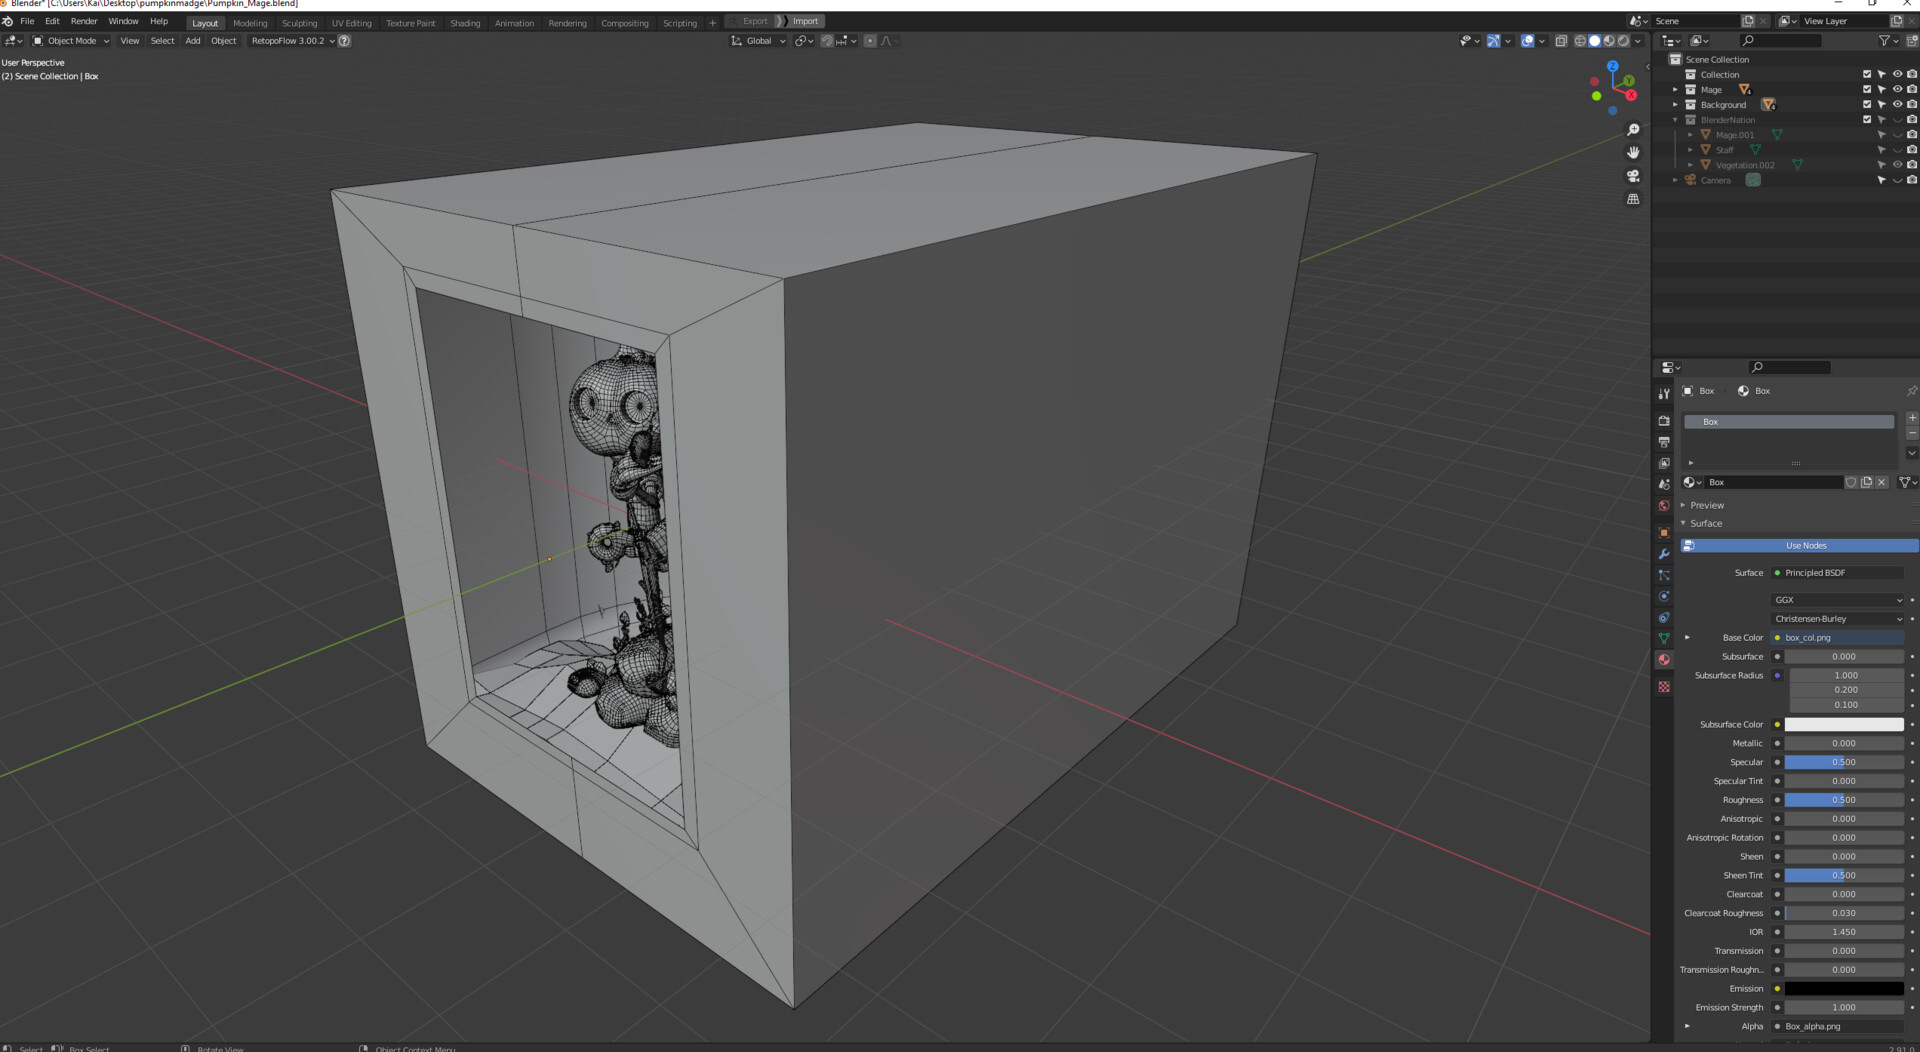
Similar to the background cards, I painted an alpha texture in Krita and plugged it into an emission material. Then I set the world color to white. This way there was no difference between the model and the world and the whole scene appeared to be a 2D canvas.
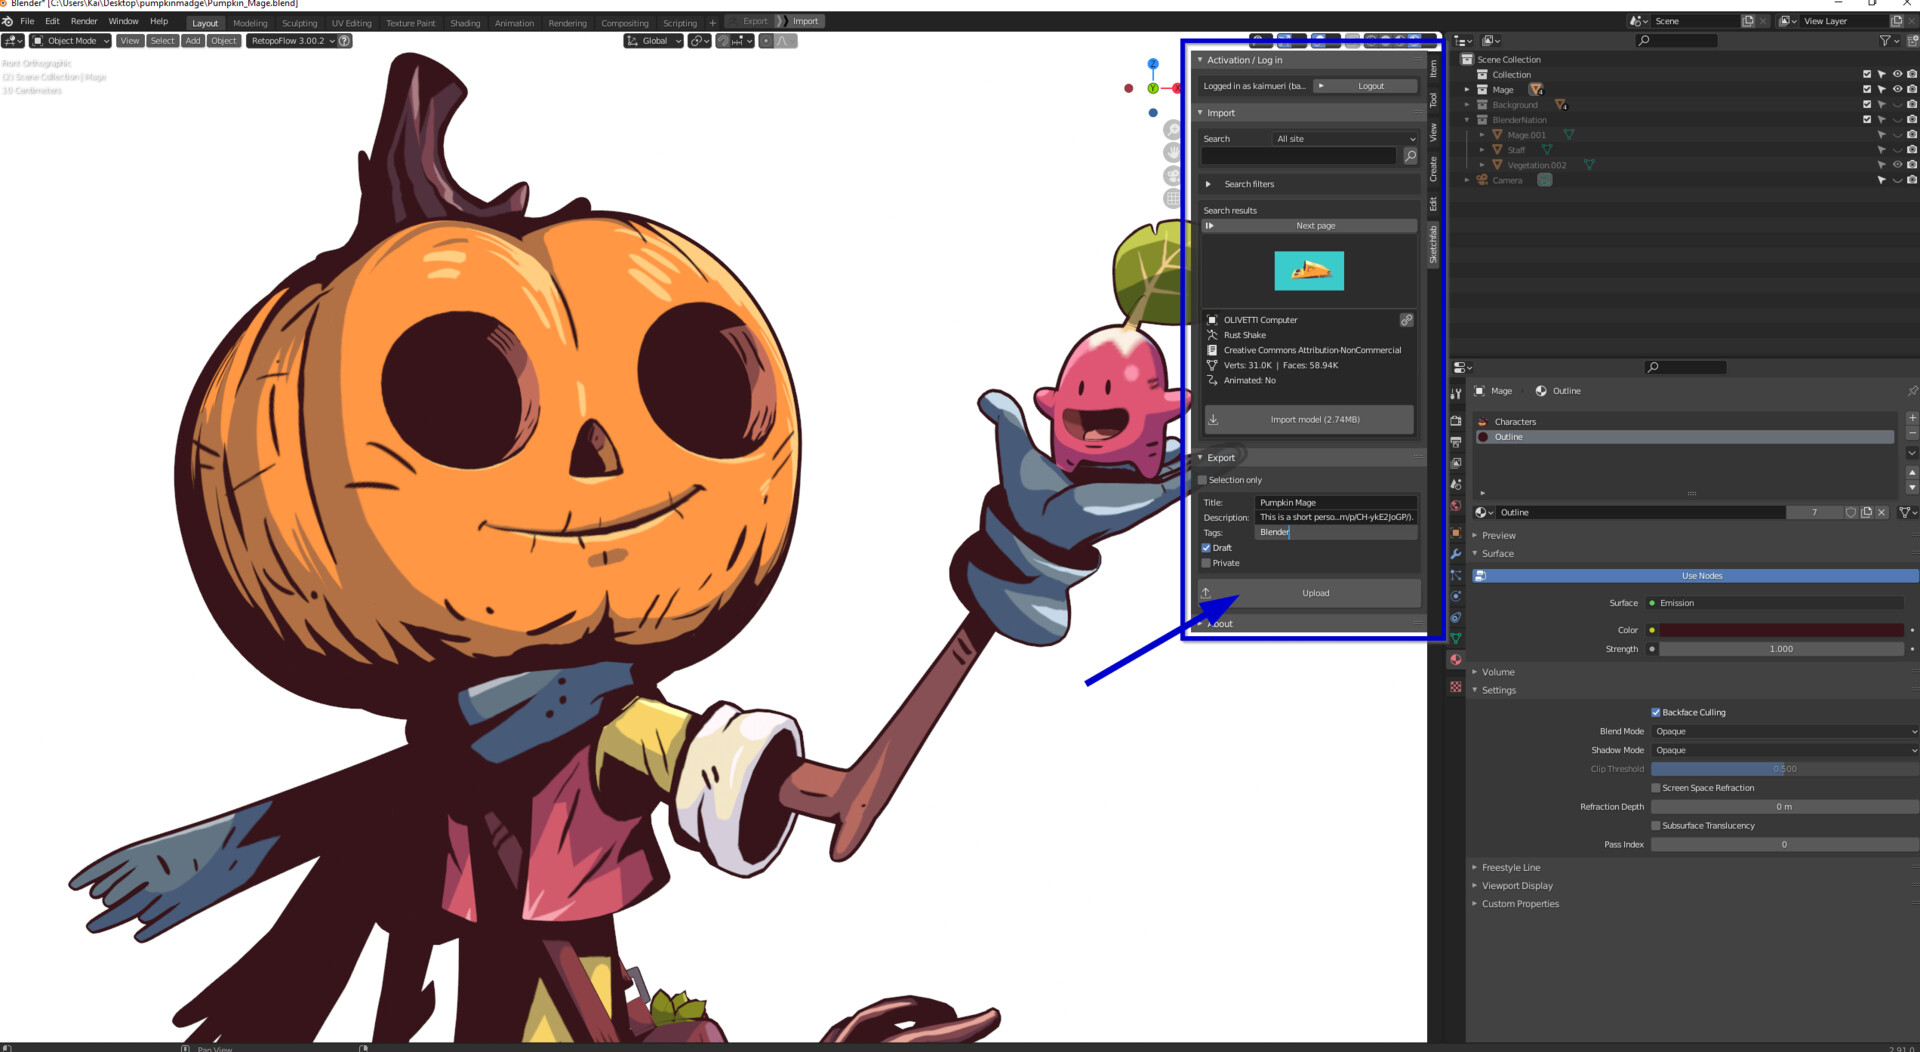
Export to Sketchfab
Exporting to sketchfab was pretty straightforward. I used the Sketchfab Blender add-on, which allowed me to select the parts I wanted to export and, with one click of a button, export them to Sketchfab directly out of Blender.
In Sketchfab, I needed to tweak a few settings to get the results I was looking for.
Set the shading to “shadeless” and the field of view to 1°
Turn off the environment
Plug the textures into the base color socket and disable everything else
Check the outline colors and disable the emission color
Enable any post-processing filters, if needed

This project was fun to make, and I learned a lot. If you have any questions about the process or the different steps of the workflow, feel free to DM me or ask in the comments. Thank you for reading until the end :)